
Composting:
Making dirt is so very rewarding. I feel like I am keeping my trash that gets taken to the landfill light, and I know that the dirt is organic because I put the organic scraps into it. The saving on dirt is encouragement enough for me. At the end of the season my big fat juicy tomatoes are all the affirmation I need for a job well done. Plus it is easy, so you have nothing to lose.
To make compost, first pick a sunny location, close to the garden but far enough away from the house to not cause a problem with critters or smell. You can use a shady spot but it will take longer and the key here is heat to break down the organic materials.
Don’t make the container too big because you will need to turn it every once in a while. The ideal size is 3 foot by 3 foot. You can buy the composting turner but in my experience the load gets heavy making it hard to spin. You need to turn the contents in order to get oxygen inside and allow the wonderful bacteria to do its job. Turning is as simple as taking a pitch fork or large shovel, inserting it into the pile and turning it over.
You will need a combination of brown and green matter. Brown can be newspaper, cardboard, sticks and dried leaves; and green is kitchen waste, grass clippings, or weeds. Stay away from dairy or meats as they attract pests; flies, wild animals and even dogs.
Building the container can be an easy creative process. I love the one they have at University of California, Santa Cruz. It is simple yet very effective. They have a larger system than you might need at home but it works well. You might even consider the concept and scale it down a bit to fit your needs. Simply build a rectangular box out of 2x4s. Use chicken wire for three sides and a removable front. They have layered 1x4s stacked to make a wall but not attached for easy access. Don’t forget the lid. Put it on large hinges and you’re done. The lid can be a frame of 2x4s with chicken wire inside or a solid plywood piece. The solid lid is heavier but it also holds in that wonderful heat better. Try painting it in a flat black which will help with the heat. Plus, then you can decorate it with pictures or flowers or tomatoes. Let the kiddos decide and bring them into the project. You can separate the inside of the box into three sections. Each with its own front entry.
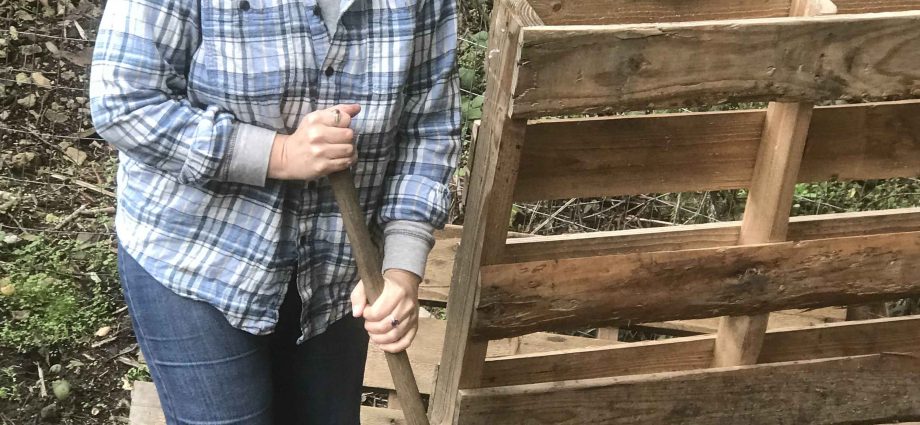
Another method to build the box is to simply screw pallets together for the sides instead of making the frame out of 2x4s. Reusing recycled and resourced materials is always a good idea.
The three bin system allows you to use dirt from one section while still building in the other two. Start with one section. Add your brown matter first. You can leave it right on the ground. Start with a stack of sticks from yard clean up. Then start adding your green matter from when you clean up after dinner. I have a small pale on the counter with a tight lid. It also has a vented lid covered with a thin disk shaped sponge. This keeps out the flys and leaves the smell inside. I take it out about once a week. They have very cute ones at World Market but I will cover how to make one in another column. Any bucket or pail will work.
Every time you add green waste to your composting bin, throw in a handful of hay to make sure there is air flow between layers. When the first bin is about half full, repeat the process in the next bin. Use a little sign to indicate which section to put the green waste. By the time the second bin is half full the first will be ready to use. It takes about 6 weeks.
Thank you so much for reading the Mountain Mama column. Living and raising children in the mountains is full of fun and challenges so let’s take on the challenges together. If you have a comment, a question, or an idea you would like to see covered please don’t hesitate to send me an email at mountainmama.mountainpublishing@gmail.com.
Building the container can be an easy creative process. I love the one they have at University of California, Santa Cruz. It is simple yet very effective. They have a larger system than you might need at home but it works well. You might even consider the concept and scale it down a bit to fit your needs. Simply build a rectangular box out of 2x4s. Use chicken wire for three sides and a removable front. They have layered 1x4s stacked to make a wall but not attached for easy access. Don’t forget the lid. Put it on large hinges and you’re done. The lid can be a frame of 2x4s with chicken wire inside or a solid plywood piece. The solid lid is heavier but it also holds in that wonderful heat better. Try painting it in a flat black which will help with the heat. Plus, then you can decorate it with pictures or flowers or tomatoes. Let the kiddos decide and bring them into the project. You can separate the inside of the box into three sections. Each with its own front entry.
Another method to build the box is to simply screw pallets together for the sides instead of making the frame out of 2x4s. Reusing recycled and resourced materials is always a good idea.
The three bin system allows you to use dirt from one section while still building in the other two. Start with one section. Add your brown matter first. You can leave it right on the ground. Start with a stack of sticks from yard clean up. Then start adding your green matter from when you clean up after dinner. I have a small pale on the counter with a tight lid. It also has a vented lid covered with a thin disk shaped sponge. This keeps out the flys and leaves the smell inside. I take it out about once a week. They have very cute ones at World Market but I will cover how to make one in another column. Any bucket or pail will work.
Every time you add green waste to your composting bin, throw in a handful of hay to make sure there is air flow between layers. When the first bin is about half full, repeat the process in the next bin. Use a little sign to indicate which section to put the green waste. By the time the second bin is half full the first will be ready to use. It takes about 6 weeks.
Thank you so much for reading the Mountain Mama column. Living and raising children in the mountains is full of fun and challenges so let’s take on the challenges together. If you have a comment, a question, or an idea you would like to see covered please don’t hesitate to send me an email at mountainmama.mountainpublishing@gmail.com.